Translate This Blog

Wednesday, January 23, 2013

Happy Birthday to my Mya!!

My darling daughter (DD) is FIVE!!! I can't believe it. Where has the time gone?! I do what I always do the day of my kids birthdays. I go through pictures and melt my heart by the teeny tiny toes and faces that have sprouted before my eyes. I'm not sure what I'm doing for her birthday. I know bad right...well I have a good excuse. I live in Omaha and there is not much to do as far as birthdays go. I was going to rent a venue and do a spa party for her and some friends but there were very few highly priced venues. I MISS ATLANTA SOOOO MUCH!!!!  I sent cupcakes to preschool for her. I think we will just celebrate as a family by going to the movies and letting her build a bear at the workshop this weekend. Chuck E Cheese's is over-rated so that wasn't an option. Having a birthday in the winter is a bummer sometimes. I know whatever we decide, she will be happy with it.


 HAPPY BIRTHDAY MY LOVE!!!!!!


Monday, January 14, 2013

DIY: T-Shirt Sac


I had so much fun creating this little number. I see bags in many stores that look like they were once t-shirts. I was definitely not paying $20 for one especially if I could make it myself. Finally I had some clothes to create one with. My daughter had spaghetti one day at preschool and of course ruined her top. I wasn't upset, after all it's bound to happen at preschool. 


If you would like to create this easy T-Shirt Sac, just follow the directions below.


First you will need the following:
  • T-Shirt ( I used two ONLY because her LOVE shirt was very thin)
  • Scissors
  • Thread (best to use the same color as your shirt)
  • Needle (if you are going to hand stitch, by all means you can use a sewing machine)
  • Straight Pins
  • Tacky Glue (optional if using two shirts like I did)
  • Ribbon
  • Feather Boa

EASY TO DO PICTORIAL DIRECTIONS


Cut off desired amount from bottom of t-shirt. I cut about two inches above hem.


After Cut
Turn shirt inside out and pin the bottom off the shirt Then stitch a seam under
straight pins across the bottom of shirt.


****IMPORTANT IF USING TWO SHIRTS IF NOT KEEP SCROLLING UNTIL YOU SEE  HEART SMILEY FACE****

**REPEAT ABOVE STEP FOR SECOND SHIRT WHICH IN THE END WILL BE THE LINING OF THE SAC**


Turn 2nd shirt inside out.  Pin the bottom of shirt with pins. Sew a seam under the pins. Turn **2nd**
shirt ONLY back right side out.


2nd Shirt right side out. You should be looking at the seam at this point.


Pinch 1st shirt while hand is still in the inside of lining. Pull  1st shirt
over lining. DON'T LET GO


Secure two shirts together with pins at each corner, both sides, and  bottom


Using Tacky Glue adhere edge of lining to the inside outer shirt all around


Using tacky glue, adhere ribbon or straps of your choice to shoulder of t-shirt sac
Secure with straight pins


Sew boa to outer outside top edge of sac. Be sure to sew boa securely over straps to keep
them from falling off.


Finished T-Shirt Sac


***IF YOU ARE NOT USING 2 SHIRTS JUST SKIP TO PICTURE UNDER THIS SENTENCE***


Turn sac back right side out looking at the seam.
THIS IS THE 2nd SHIRT WHICH IS INNER LINING
Still same concept. I  forgot to take a picture using my LOVE  shirt.


Glue ribbon or straps of your choice to  inside shoulder of t-shirt
secure with straight pins


Sew boa to outer outside top edge of sac. Be sure to sew boa securely over straps to keep
them from falling off.


Finished T-Shirt Sac


What do you think? Comments are always welcome :D If you have questions you can post them here too.

Enjoy lovelies!!


Sunday, January 13, 2013

Long Weekend

Well I had planned on some craft diys this weekend but my youngest son Jayden has had a high fever. I have no idea what is going around other than the Flu. We spent hours in the emergency room last night with a 103.8 fever. Then to only turn around and go back this morning with a strange rash. The doctor only could tell me it will probably get worse before it gets better and to give him benadryl if he develops an itch. I wish there was a magic cure for him but there isn't. We will just have to let it run its course. (By the way its suppose to be 2-3 weeks!!) I just want my little guy to get better soon. :(

Monday, January 7, 2013

Get The Look: Beyoncé Inspired

I have wanted to recreate so many of Beyoncés outfits! I finally got around to actually doing it!

This picture is a year or two old but it has always been a favorite! 
I didn't want to COMPLETELY cop her so I threw my own twist on it. ;D

  • My jacket is by Xhilaration by Target. I got it new from my local thrift store for $5! Its made of seude.
  • My scarf is an infinity scarf that I made myself. Check out the tutorial in DIYs. I would guess and say material wise it was about $5.
  • My bag is a Dooney and Bourke that my honey got me a few years back. It was about $300.
  • I just have on a regular white cap sleeve shirt from Body Shop many moons ago. I think I paid $2 off the clearance. 
  • My Angel brand jeans I got from Gordmans. They were on sell last year for $10!!
  • My boots came from Wet Seal this past fall 2012. They were marked down to $8!!!


So my total outfit comes to $330. I think I did pretty darn good! I am going to search and see if I can find the price of her outfit. Being that it is a few years old that it may be a little hard. Im will to bet that hers was waaaaaayyyyy more than mine. Thanks for the support. Stay tuned...more Get The Look Inspirations coming soon.

DIY Infinity Scarf

Just about everywhere I go I see these adorable Infinity scarfs! The ones that I have seen are about $30. I have wanted one of my own for a while, but that is more than I would like to spend.  I figured something like that would be fun and easy to make. I went to Hobby Lobby and I got 2 yards of fabric for $11.97. Hobby Lobby usually has fabric on sale for 30% off. If not, you could always use the 40% off coupon.

This fabric is cut 48in x 16in.
I used my Singer Stitch Sew Quick to sew the scarf. My intention was to hand stitch it until I realized how much fabric 2 yards was! Ha ha. Here is a photo tutorial of the cheetah print infinity scarf:
Fold the fabric in half "hotdog style" inside out. Using Ball Head Straight pins, secure the sides to be sewn.


For the purpose of this tutorial I used white thread but I recommend using black.


Hand stitch or sew the fabric along the straight pins.  Only sew the long side.
(If you are using the  Singer hand held YOU MUST REMOVE THE PINS AS YOU GO ALONG!)
Pull fabric back to outside in.
PAY CLOSE ATTENTION!

You need to insert one short side of the fabric into the other short side. The outer side needs to be folded inward about 1/2in. Secure with Ball Head pins. Sew along pins making sure not to sew the middle of the fabric and only the two sides.
Seam when finished.

You can also sew the sides a different way by just sewing the sides together instead of tucking. I did it my way so the seam would be less visible.


Finished product.

Check out post on Get the Look: Beyoncé Inspired featuring this scarf! Thanks for the support.


Saturday, January 5, 2013

Fashion Sense

I love looking through Glamour Magazine at all the celebs! Their stylist do a great job dressing them with the latest fashion. I was always curious about how much their outfits cost. Glamour is good about putting the prices in their articles. I think most of them walk around wearing AT LEAST $12,000 worth of designer clothing. Of course we normal people want to "Get The Look" without breaking the bank. Now that I started this blog, I thought it would be fun to have a blog section where you can cop their styles for less. I am working on my  first "Get The Look" now and it will be from Beyoncé. Between her and Kim Kardashian, I don't know whose style I love more. I will be posting soon in the Get The Look section of my blog. Thanks for the support!

Thursday, January 3, 2013

Website Changes

Please excuse the website construction. I will continue to update and blog while I make some changes! Thanks!!

Wednesday, January 2, 2013

Salon Express

As Seen On TV has been around for many years. I never actually purchased anything from the infamous infomercials nor the stores. Well, last year sometime I saw an intriguing product called Salon Express. 

Everything it comes with.  Mine was used once before this picture.

 It's suppose to allow you to do some nail art at home without paying nail salon money. I thought about purchasing it for a while. I finally gave in this pass holiday season, however I did not make my purchase via As Seen On TV. By now, most of these products are available at local retailers. I purchased my Salon Express from Kmart. I paid the same price $10 plus my state taxes. Not bad. I wanted to do a quick review for those of you who were weary about purchasing one yourself. First I will show you the photo tutorial for what method I used, then I will give my opinion. Let's get started!!

Here is everything that you will need:
  • Salon Express Stamper, Scraper, and Image Plate
  • Nail Polish (2 colors & Top Coat)
  • Nail Polish Remover
  • Cotton Balls
(The directions recommended using nail art polish but I didn't use it this time.)


The process:


First polish your nails with the lighter color. Allow adequate drying time. I recommend 2 coats .

Apply polish to design of your choice. I chose the zebra print.

Be sure to cover design completely but don't over do it.

Using the scraper, scrape off excess nail polish. Next few steps mush be done quickly.

Press the stamper onto polished design.

Quickly transfer design using a side to side rolling action. I only rolled once.

FINAL RESULTS!!!


I really enjoyed this little gadget. It was quick, easy, and convenient to use. This was my second time using it. I think with more practice I could be a pro at using it. The clean up was very easy, although if nail polish gets onto image plate holder, its hard to come off. All you need is nail polish remover. The only few issues I had with it is that you only get five image plates with mediocre designs. When you remove the blue film, the white imprinted words flake off and stick to your hand!! I would use a glove. I had to use nail polish remover to get rid of it. Soap and water didn't work. This is a really inexpensive way to spend time with my daughter or to just pamper myself. I hope this helped. What do you think? Buy or Pass? Thanks for the support!!

Tuesday, January 1, 2013

My Natural Hair Must Haves to Promote Healthy Natural Hair


Here is a list of my go to products and essential must haves:

SHAMPOO

One'n'Only Argan Oil Moisture Repair Shampoo- I really like this shampoo. I got it from Sally's for like $3.50 since I have a beauty club card. I cleanses really good and adds moisture. It's sulfate, phosphate, and paraben free.


I really really want WEN by Chaz Dean! Check out the official site here!


CONDITIONER

Herbal Essences Hello Hydration Conditioner- This was the first conditioner that I ever tried! I love it. It smells so good just like coconuts on a tropical island. LOL. This product was so gentle to my hair that I have even used it as a leave in. I also tried Totally Twisted Conditioner too. But I prefer Hello Hydration. They are both like $4 at Walmart. TRESemmé Flawless Curls Conditioner works extremely well to. I still would go with Hello Hydration though. I think it maybe the smell lol.


HAIR OILS

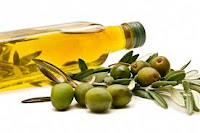
I use a wide range of hair oils. My all time favorite is extra virgin olive oil. I also use coconut oil and  sweet almond oil which I got from Whole Foods. I use Castor oil but I got it out of the pharmacy section in Walmart.


FOR ADDING MOISTURE

Shea Moisture has been really good to me as far as MOISTURE is concerned. I have the whole line of Coconut & Hibiscus. The Curl & Style Milk is a great moisture product in general. I use it after I co-wash. The Curl Enhancing Smoothie does not enhance my curls as far as definition is concerned but it does moisturize and add a nice shine. I typically use this when I'm wearing a puff of some sort. The Hold & Shine Moisture Mist is okay. I use it to add a quick boost of moisture especially when I am wearing an afro.


CURL DEFINING
Kinky Curly's Curling Custard works really well for me. I love the wash and go look. I have used the Knot Today with it and without. It is a great leave in product even when your not going to style. The Spiral Spritz worked really well for my twist outs. My twists were really defined when I used it. ECO STYLER Olive Oil Styling Gel works wonders! I use this especially when I don't have the time to set my hair.  I just wet my hair, apply the gel, and put on my  half scarf to lay my hair down and define waves. When I get to my destination, I remove my scarf and put on a stretchy headband.


NIGHT CARE

Before bed, I will detangle with a spray bottle of water and a leave in. Then I use a satin bonnet. On lazy nights, I'll sleep on my satin pillow case instead of bonnet.


GROOMING

Every natural needs to at least have a good wide tooth comb and detangle brush. I bought most of my wide tooth combs from my local beauty supply store. They usually have a bundle of different types of combs for under $5. The famous Denman D3 Classic Styling Brush is really good. It is expensive but you can get it from Sally's Beauty Supply for cheaper if you are a beauty club member. Membership is just $5 a year.


If you still don't want to pay too much but want a similar brush, you can definitely find one. I got one from Kmart for my daughter. It was buy Conair. I think it was like $3.


NOT FOR ME

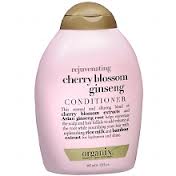
Organix Rejuvenating Cherry Blossom Ginseng Conditioner- This conditioner did not add moisture to my hair at all. I was not very fond of the smell either. I was pretty disappointed especially because it wasn't cheap. It's a small bottle and you don't get a large amount of product.


Giovonni Direct Leave In- My hair absorbs this product to quickly. I'm not sure why. I get lasting results better when I use Hello Hydration as a leave in. I will try the other Giovonni leave in products in the future I'm sure.


Miss Jessie's- I tried samples of the Baby Butter Creme and Curling Pudding. They both made my hair feel hard. I didn't like that feeling. I am also not willing to pay that much for products. It's the most expensive product that I have found and tried.
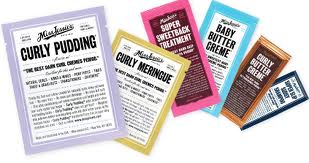
SAMPLE SIZE


Cantu Shea Butter- This product makes my hair feel amazing. It was so soft and shiny. The problem was that it left white residue. It didn't matter how little or how much I used.


REMEMBER THAT HAIR VARIES FROM PERSON TO PERSON. EVEN IF YOU HAVE THE SAME HAIR TYPE, A PRODUCT THAT WORKS FOR ONE MAY NOT WORK FOR ANOTHER. VISE VERSA. GOOD LUCK!!!